As the festive season approaches, the twinkling glow of Christmas lights casts a magical ambiance in our homes. However, frayed or broken wires can dim that cheer, leaving us fumbling in frustration. It’s time to turn the tide and restore the festive spirit by learning a valuable skill: fixing broken Christmas lights. In this comprehensive guide, we’ll journey into the intricacies of Christmas lights, understand their anatomy, and equip you with the know-how to restore their luminous enchantment.

Image: www.pinterest.com
Deciphering Christmas Lights: A Journey into Illumination
Christmas lights, an indispensable element of holiday décor, are a marvel of electrical engineering. Each bulb contains a tiny filament that glows when an electric current passes through it. The bulbs are connected in series, meaning the current flows through each bulb in sequence. When even one bulb fails, the entire strand goes dark. This is why repairing a single broken wire can illuminate the entire strand, restoring the festive glow to your home.
Mastering the Art of Wire Repair: A Comprehensive Solution
Fixing broken Christmas lights is not rocket science. With a steady hand and a keen eye for detail, you can easily mend those pesky wires and bring back the sparkle. Here’s a step-by-step guide to this festive electrical repair:
1. Safety First: Prepare for the Repair Mission
Unplug the Christmas lights before attempting any repairs. Safety should always come first, so make sure your work area is insulated and free from hazards. Gather the necessary tools: a wire stripper, electrical tape, and a stable work surface.
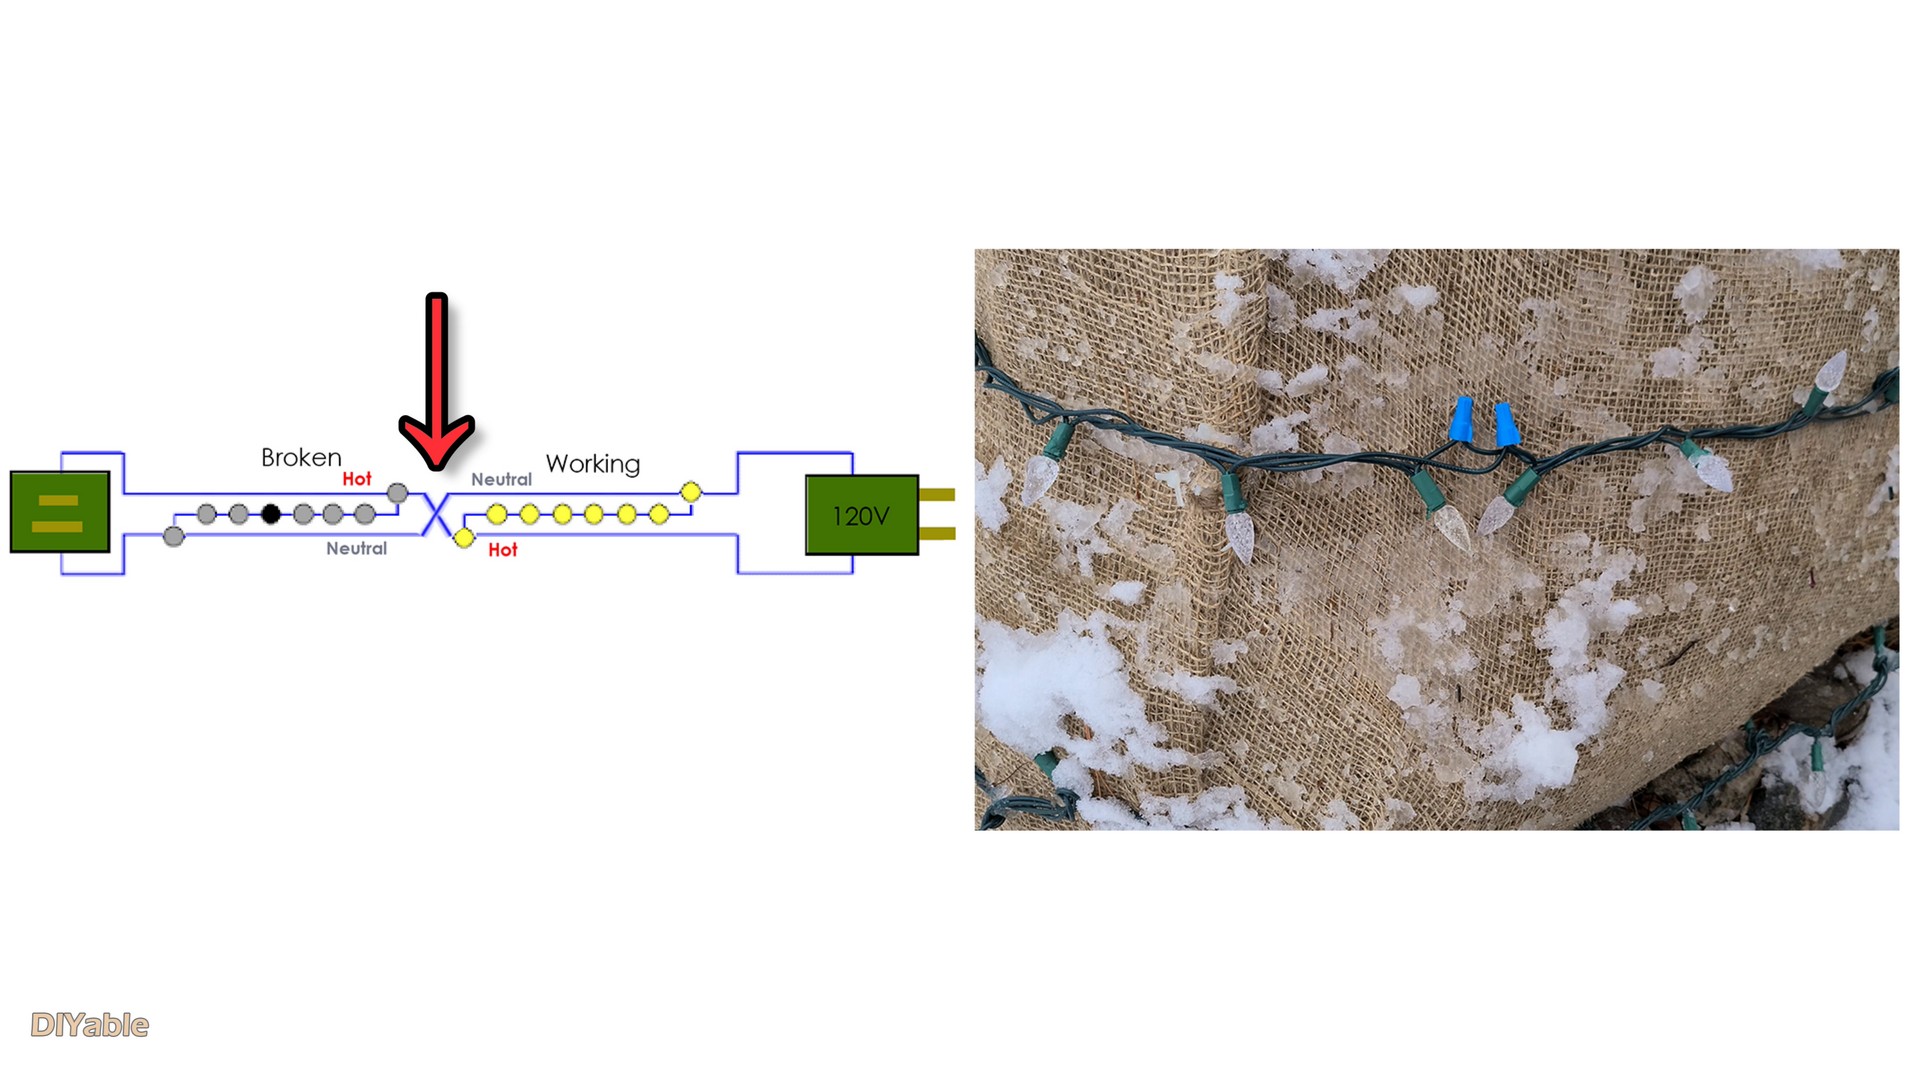
Image: www.diyable.com
2. Identifying the Culprit: Isolating the Broken Wire
With the lights unplugged, meticulously inspect each bulb and socket. Look for signs of damage, such as loose connections, exposed wires, or burnt-out bulbs. Once you’ve located the damaged area, carefully cut the wire a few inches on either side of the break.
3. Stripping the Wires: Unveiling the Electrical Essence
Strip away a quarter-inch of insulation from the ends of both cut wires using your wire stripper. Be precise and avoid nicking the wires.
4. Joining the Wires: A Delicate Electrical Bonding
Twist the exposed ends of the wires together clockwise. Ensure you achieve a secure connection without any loose strands. For added durability, you can also solder the connection.
5. Insulating the Repair: Shielding the Electrical Bond
Wrap the electrical tape tightly around the exposed twisted wires, ensuring no naked metal is visible. Overlap the tape by half its width for maximum protection.
6. Light it Up: Testing Your Repair Skills
Plug in the Christmas lights and cross your fingers. If the strand illuminates without any hiccups, congratulations! You’ve successfully repaired the broken wire.
Expert Insights and Pro Tips: Enhancing Your Repair Capabilities
To elevate your Christmas light repair game, consider these expert tips:
-
Invest in a Voltage Tester: A voltage tester can help you identify the exact location of the break by detecting which wire is carrying electricity.
-
Use Heat Shrink Tubing: For a more professional finish, slide heat shrink tubing over the twisted wires before applying electrical tape. Heat the tubing with a heat gun or lighter to shrink it and provide a robust insulation layer.
-
Replace Dim Bulbs: Dim bulbs can strain the electrical circuit and cause other bulbs to fail prematurely. If you notice any dim bulbs, replace them to maintain the strand’s longevity.
How To Fix Broken Wire On Christmas Lights
Conclusion: Rekindling the Festive Glow
Fixing broken Christmas lights is a simple yet rewarding task that can illuminate your holiday season. By following the steps outlined in this guide, you’ll be equipped with the knowledge and skills to restore the radiance of your Christmas lights, ensuring a festive atmosphere throughout the season. Remember, with a little patience and attention to detail, you can keep the holiday spirit burning brightly. So, bring out those tools, embrace the festive spirit, and let the glow of Christmas lights fill your home with warmth and cheer!
